Sometimes you don’t have a ball winder. Sometimes a ball winder doesn’t make a lot of sense, like when you’re winding mini skeins. You can still have a centre-pull ball. It’s pretty simple if you start it off right.
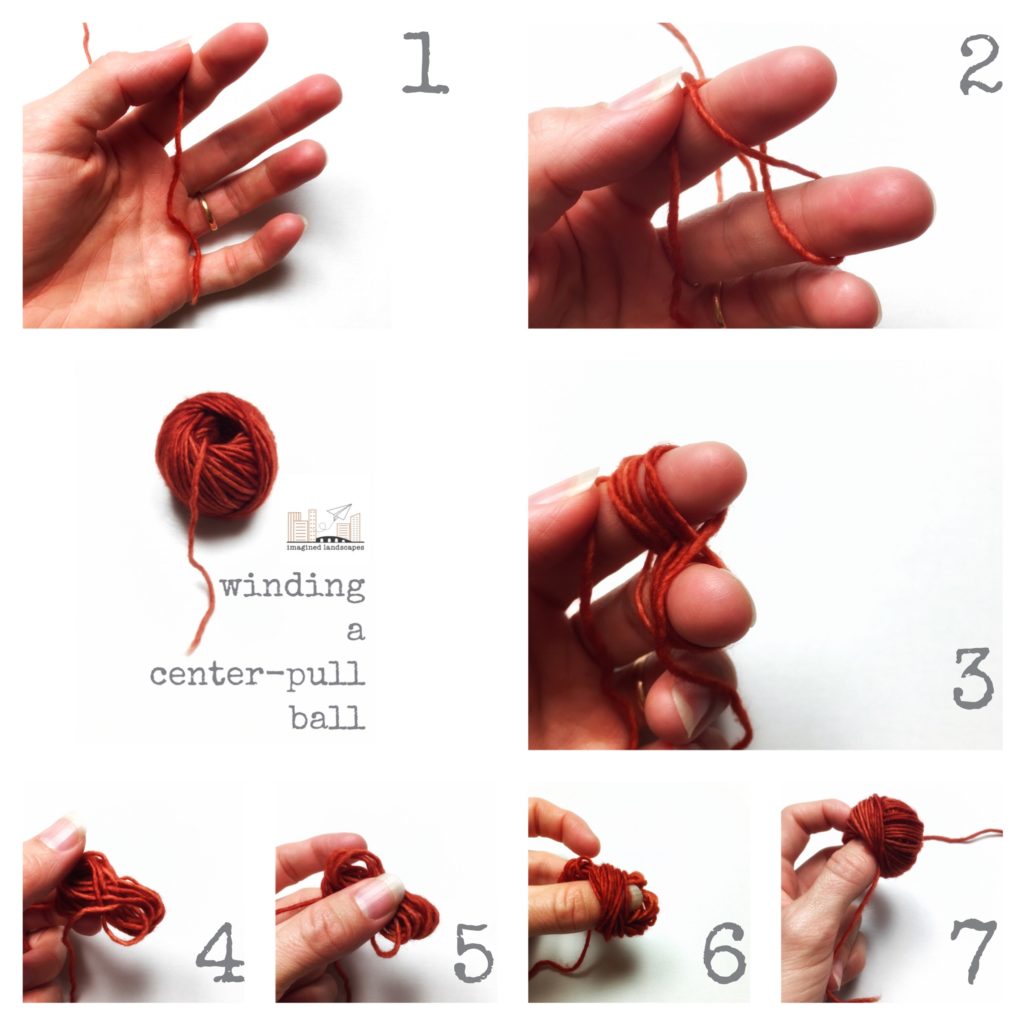
Step 1: Drape the yarn tail over your palm.
Step 2: Holding the tail with your thumb against your forefinger, begin to wind the yarn around your first 2 fingers in a figure-8.
Step 3: Wind about 15 figure-8s.
Step 4: Pinch the yarn at between your finger and thumb and gently remove the wraps.
Step 5: Keep the tail towards your palm and hold your thumb over the point where the tail leaves the figure-8. Holding your thumb over this spot is the key. If you always keep the thumb where the tail is coming out, you’ll have a centre-pull ball at the end.
Step 6: Start winding the yarn, slowly rotating around. (Keep that thumb over the tail.)
Step 7: Keep going until you’ve used all the yarn and then just tuck the last bit under some of the nearby wraps. You don’t have to keep your thumb buried deep into the heart of the ball if you are winding a whole 50-100g hank, as long as the thumb is always protecting the tail location. You can see in this step how one of my fingers is holding the tail against my hand – I find this really helps at the start.
In the end, you’ll have a lovely, useable ball that doesn’t have to bounce around your sofa when you need more yarn.
Even more tutorials on the Knitting Tutorials page.
Wow! This is so helpful! Thank you for posting this!