So your shawl calls for a garter tab cast on. It’s a common start to shawls that begin at the top with a few stitches and grow as you knit because it starts the shawl off with a beginning that is fairly stretchy. It also gives you an edging to the shawl that looks unbroken all along the top. Seamless garter all along the top edge of the shawl – pretty neat trick, right?
It’s a pretty simple process, but like anything that is new, ignorance can lead to intimidation.
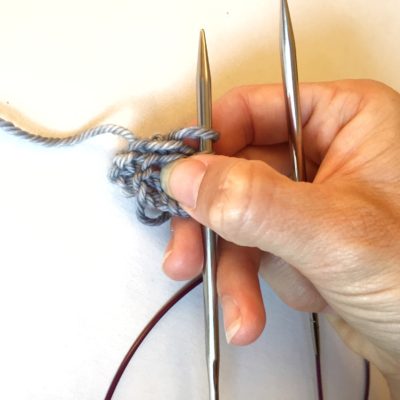
Your shawl will give you directions for how many stitches to cast on and how many rows to work them. The Travelling Landscapes Shawl starts this way, so we’ll use it as an example. It reads:
“Cast on 3 sts. Knit 6 rows. Turn work 90 degrees and pick up 3 sts. Turn work 90 again and pick up 3 sts from cast on edge (9 sts on needle). Note: It is easier if you use the other end of the needle to pick up the sts from the tab and then knit them off.”
So let’s break that down.
You’ve cast on 3 and knit 6 rows. That’s going to give you a wee rectangle 3 stitches wide with 3 garter ridges long.
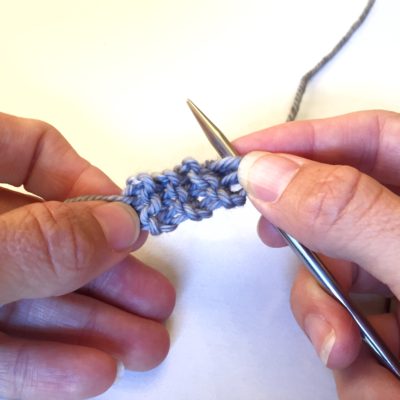
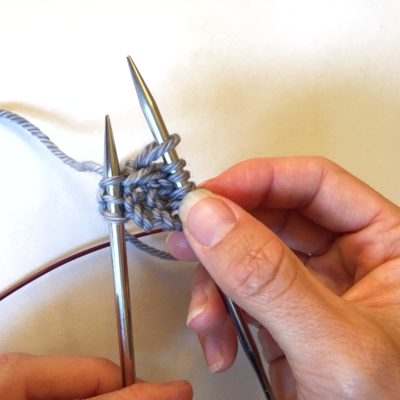
Next we’re supposed to “Turn work 90 degrees and pick up 3 sts”. That’s a bit tricky at times, so here’s a tip: Use the left needle tip to pick up the stitches from the ridges. We knitters usually use the right needle tip for picking up stitches, but since the garter tab cast on requires us to ‘turn a corner’ to do that, it’s just a bit awkward.
Once you’ve picked up from the three ridges, just pretend they’re normal stitches and knit them off. No cramped maneuvering.
It will look like this at this point, with 6 stitches on the needle:

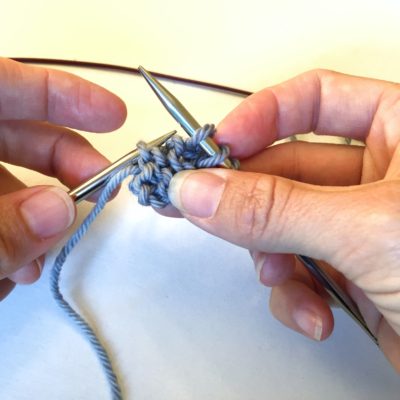
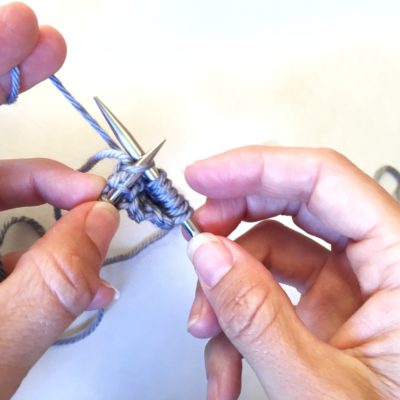
The final bit of instructions read: “Turn work 90 again and pick up 3 sts from cast on edge (9 sts on needle)”. If you pinch the stitches a bit and move things around, you can find the 3 stitches that you originally cast on, the bottom of the wee rectangle that is now pulled out of shape by those other 6 stitches.
To make it easy, use the left tip again. Pick up 3 of the legs from those original stitches.
Now just knit those 3 stitches as you would normally.
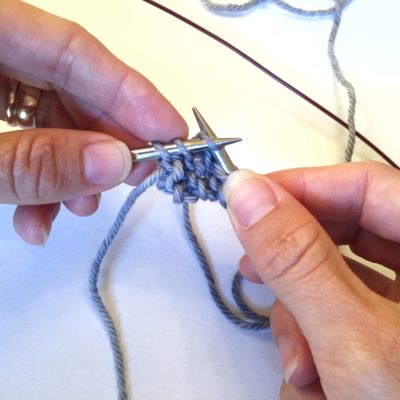
So there you go…9 stitches on the needle, ready to become a shawl:
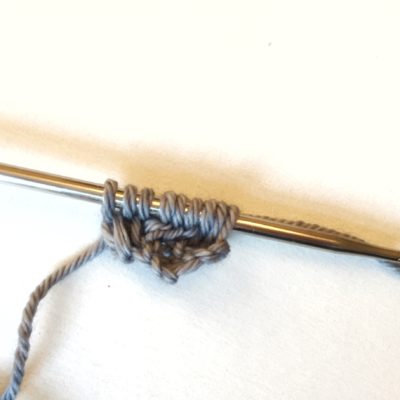
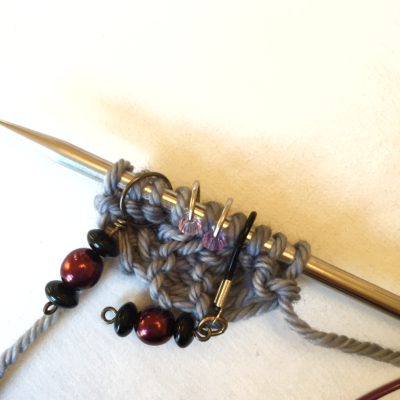
Here’s what it looks like for the Travelling Landscapes Shawl with the stitch markers added: 3 garter stitches on the right edge (marker) 1 stitch to become the right half of the shawl (marker) 1 stitch to be the centre spine (marker) 1 stitch to be the left half of the shawl (marker) and 3 garter stitches on the left edge.
More tutorials on the Knitting Tutorials page.
I got the pattern for Travelling Landscapes Shawl within the past 2-3 weeks and am so anxious to start it. Wolseley Wool, here in Winnipeg, has a sample hanging up and when I saw it – it was immediately “I Need That!!”. Anyway I was just printing a copy of the pattern and noticed your tutorials.
This one is amazing. I struggle with this cast on every time and am never really happy with the finished product. You have made it look so easy and most important, user friendly. Thank you so much for this. I am now going to print off of a copy of this so that it will be with me when I cast on.
Again thank you for these instructions and for the gorgeous shawl pattern.
Linda